Prestashop is e-commerce software for launching an online store.
Not only does it enable you to create an e-commerce store, but also to develop it in an innovative and effective way.
Its ease of use and the platform’s support for e-tailers have made it a great success.
Why install Prestashop locally?
Installing prestashop locally means you can build a test version on your own computer before going into production with a hosting company and opening your store to the public.
Tools needed to install Prestashop locally
First of all, you need a web download platform that integrates with your operating system and allows you to install a server and a database.
You’ll need this to store all your Prestashop settings.
There are tools available free of charge on the Internet that enable you to build a web server architecture on any platform, such as :
- Wamp (Windows + Apache + MYSQL + PHP) under Windows,
- Mamp (Mac + Apache + MYSQL + PHP) on MAC
- and Lamp (Linux + Apache + MYSQL + PHP) on Linux.
These servers, called Apache, create a MySQL database, which is useful for storing all Prestashop parameters.
PHP is the programming language that executes the commands.
These tools are more commonly known as AMPs.
As these AMPs are open source software, you can download them free of charge from their respective sites.
Installation starts automatically, and you can finalize it by clicking “Next” at each stage.
Finally, you’ll need a browser (Microsoft Edge, Google Chrome or Mozilla) to open your site locally, to administer and manage it as if it were online.
Download Prestashop locally
Then download the latest version of the Prestashop Open Source CMS by going to the official site page in the “Product” tab.
Enter an e-mail address and accept the Data Protection Policy and General Terms of Use. 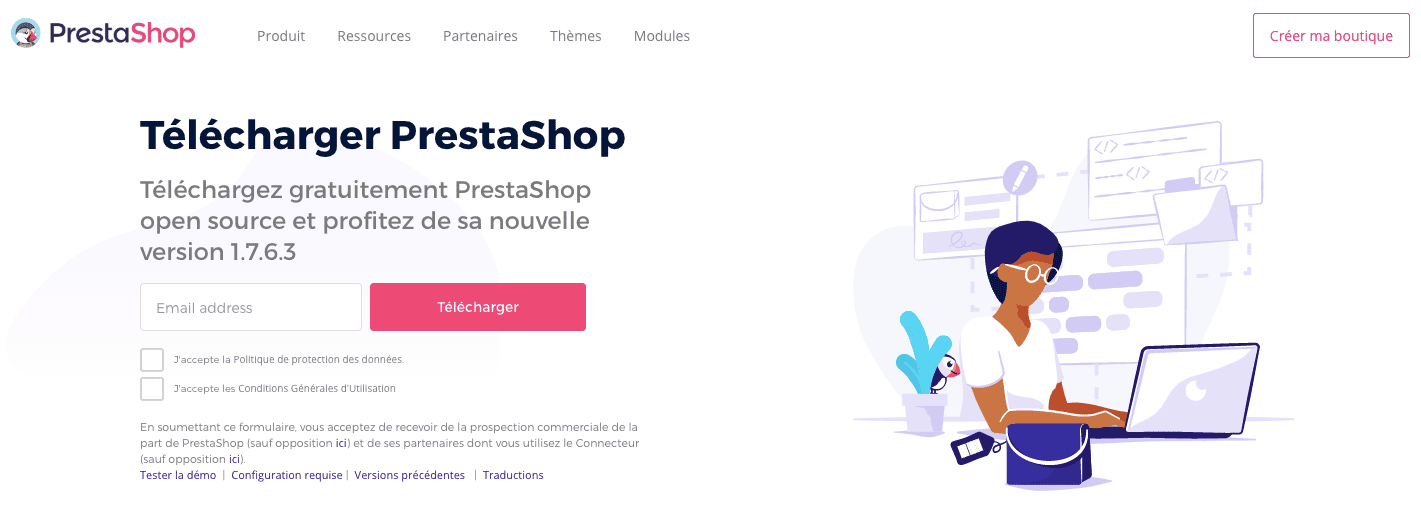
Rename the folder with the name of your site, which must be written in lower case with no spaces.
All files required for installation and operation will now be available.
Installing the Prestashop database locally
It’s time to launch your AMP.
- If it’s green, the apache server is active.
- It is displayed in red if not launched.
- and orange if one or two of the three services are activated.
To create your database, click on “phpmyadmin”.
Simply open the installed software to access the connection interface.
For example, enter Root as your user name, no password, then click on “Execute”.
The new database will contain all site information and structure.
Install Prestashop locally
The next step is to install Prestashop locally.
Go to http://localhost by clicking in the bottom right-hand corner of your PC in the notification area.
This is your access folder, so you can see where you are when you’re on your private server.
In the “Your Projects” section, click on the “nomdevotresite” folder (as you renamed it earlier), or type the following address: http://localhost/nomdevotresite directly into your browser.
Language selection
Once the file has been executed, you’ll be taken to an “installation wizard” page, where you’ll need to select the language in which you’d like to use Prestashop, accept the terms of use and click “Next”.
The system compatibility check is then displayed.
Configure administration
You’ll now be able to create your store’s administration by filling in the requested information. No one else will be able to access it, as it’s a local installation.
This information is not definitive and may be modified at a later date. 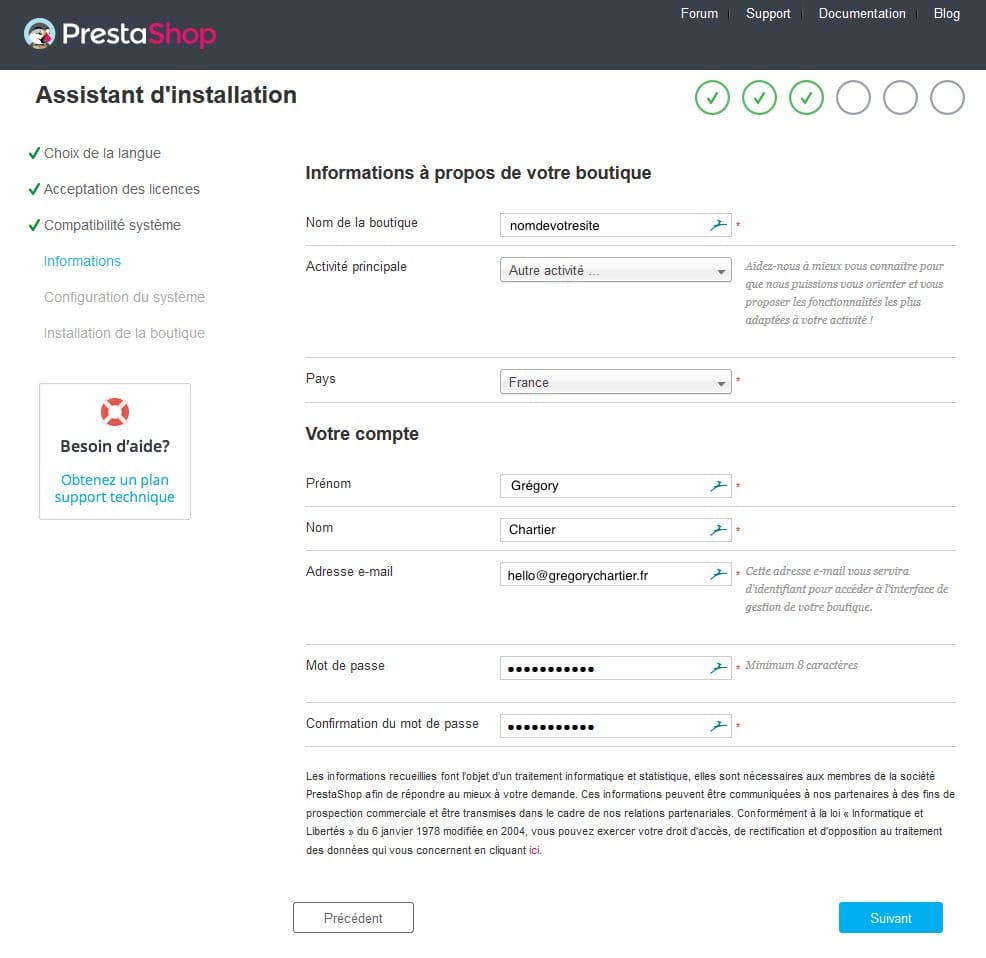
Configuring the database
Next, configure the database.
To do this, enter the information you noted when creating the database on the server, which will enable the system to access it, and click “Next”.
The various tables will then be created in the database to insert all the tables required by Prestashop (catalog, themes, modules, etc.).
End of local installation
Once installation is complete, if everything has gone smoothly, all messages are green.
All that’s left is to access the Front Office, i.e. your store, by clicking on “Discover your store”, and the Back Office, i.e. its administration with the previously configured data, by clicking on “Manage your store”.
At this point, PrestaShop will automatically change the name of the administration folder for greater security.
It will then ask you to delete the installation folder that was unzipped at the beginning.
To conclude about installing prestashop locally
You’ve just installed Prestashop locally on your computer.
This allows you to work in an ideal test environment.
If you need any assistance with Prestashop, don’t hesitate to contact me to discuss it. As a Prestahop developer since 2008, I’d be delighted to help you with your e-commerce project.